 Yesterday was such a dreary day. It was raining and miserable. So what is someone to do when the weather is not good? Why, frame button badges of course.
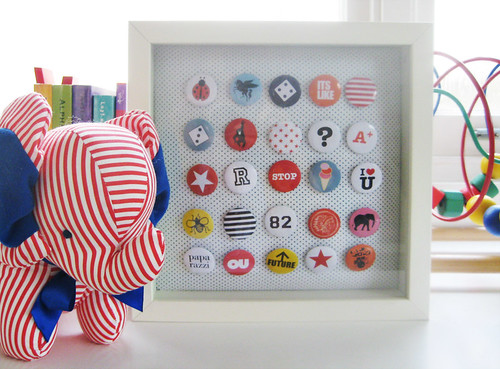
I visited Gumboots the other day and oh how I love this kids store. I bought a few button badges for Robert and yesterday I framed them for his room. It turned out rather cute I think.
Here's how I made it. It is really easy and probably doesn't warrant a step-by-step but here it is anyway.
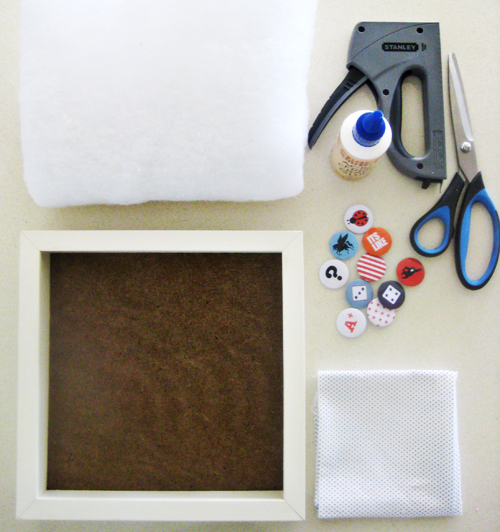 Materials:IKEA Ribba frame 25cm x 25cm in size
25 button badges
35 x 35 cm of fabric
Staple gun
Wadding or foam
Scissors
Craft glue or adhesive spray
Wadding 25cm wide x approx 1m length
Instructions:
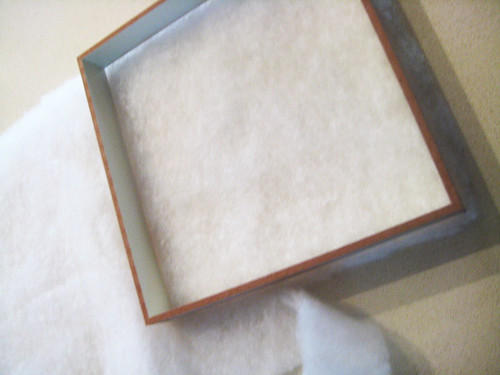 1. Remove all papers from within the frame and cut wadding to fit the width of the frame - approx 25cm wide x 1m length. I folded the wadding over a few times to make it thicker. If you use thick foam just cut it to 25cm x 25cm in size.
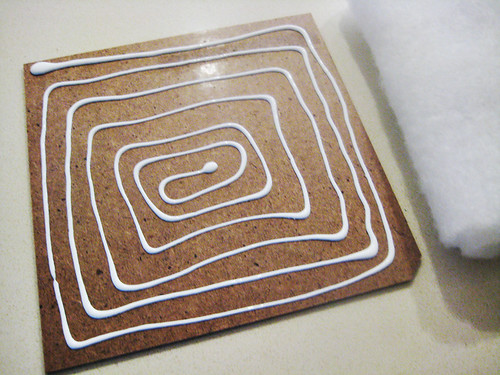 2. Glue the back board of the frame and fix the wadding onto it. Let it dry. Adhesive spray might be best to use but I only had craft glue handy.
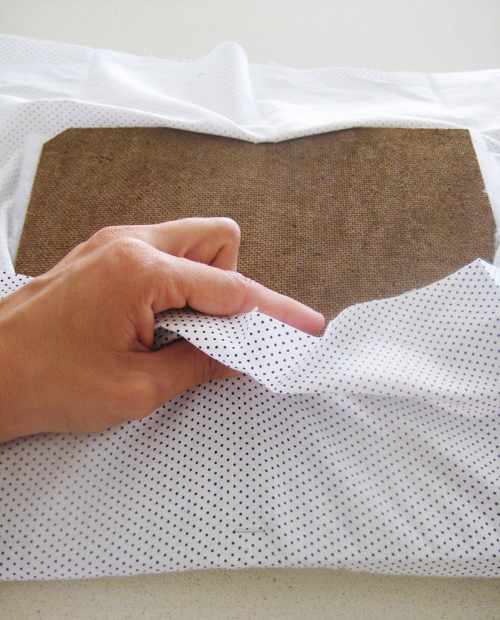 4. Turn the board and wadding upside down onto the fabric. Pull the fabric over one side and staple once in the middle of that side. Place one staple into the middle of all sides pulling the fabric tightly so that the fabric doesn't sag.
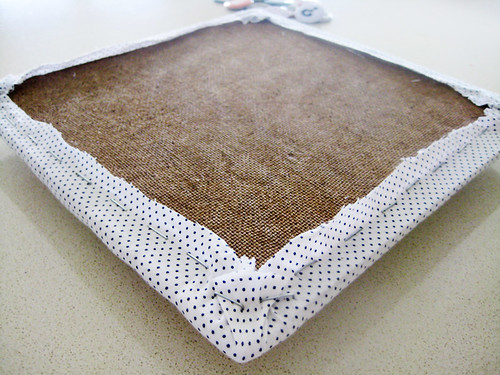 5. Continue stapling around each side pulling the fabric tightly as you go. Fold the corners over neatly and staple in place. You can cut a piece of board or fabric to cover the staples but I left mine as is because you can't see it when hung on a wall and I'm lazy.
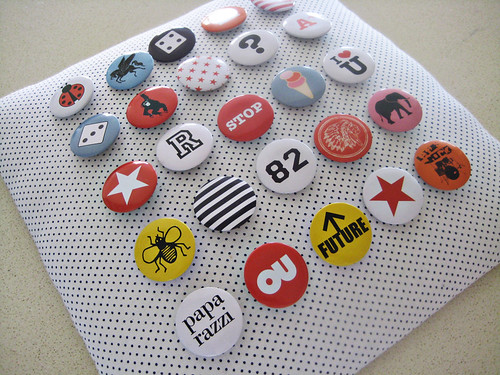 6. Line up your badges and pin away! Pop into your frame and you are done.
I think this would look great if you collect vintage badges or other small collectables that can be mounted like this.
We also made some changes to the living room over the weekend. I'll take a photo of it to show you. Hope you had a nice weekend!


